# Writer Deck Part 3 - Final Assembly
What I finally decided on for a writer deck was a shorter path to success. I was more interested in using the writer deck than in perfecting it. I also accepted that I will never have a mastery of aesthetics, so I went with what worked for me, and what I could live with, looks-wise.
# Bill of Materials
# Raspberry Pi Zero 2 W (opens new window)
The guts of the deck. It has everything I need to run a GUI-less Linux instance. I used the Raspberry Pi Imager (opens new window) which allowed me to set up Wi-Fi as part of the installation process
# 5-inch Monitor (opens new window)
This has a separate power connection from the Raspberry Pi, as well as an HDMI port. I'd tried a different monitor with an SPI connection through the Raspberry Pi's pins, but I couldn't find documentation that was conclusive on which pins to use or how to set up the software. The HDMI connection worked, with some software configuration.
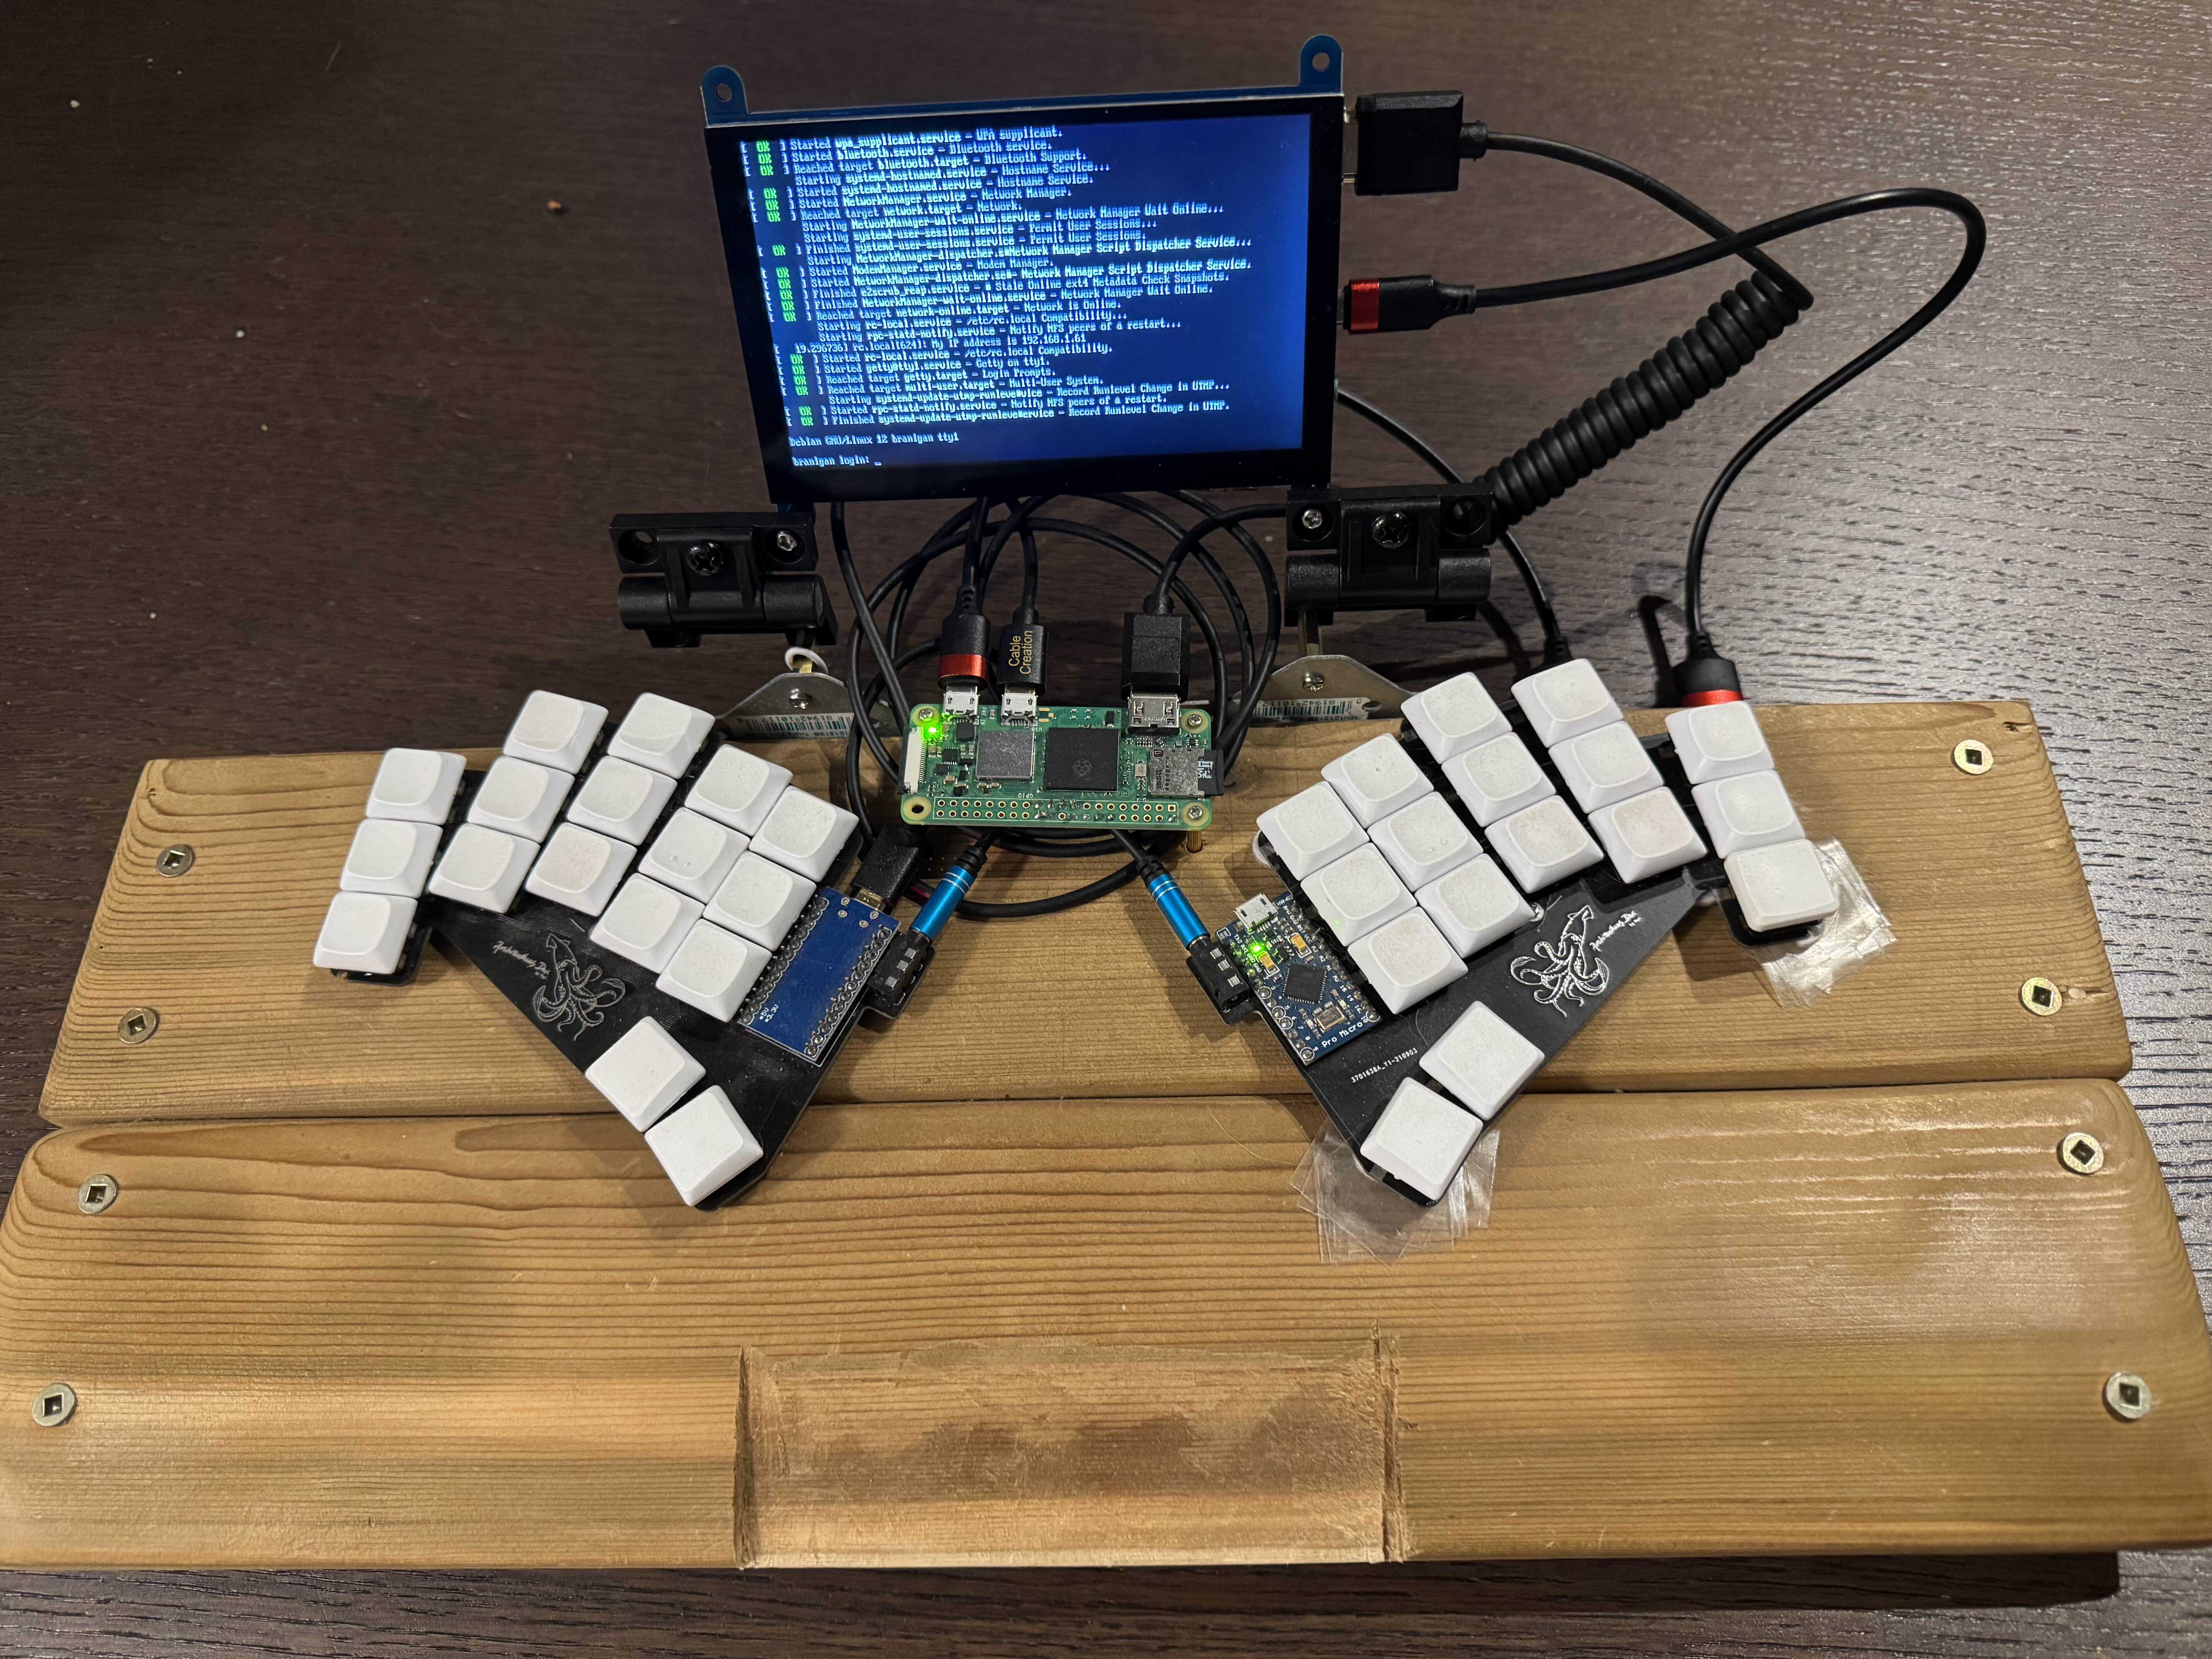
# Architeuthis Dux Keyboard (opens new window)
My friend Darren and I ordered a bunch of Architeuthis Dux PCBs from JLCPCB a few years ago. I found a keymap that I liked, and I've been on 34-key keyboards pretty much ever since. I waffled on whether to use the a-dux or a Ferris Sweep keyboard. They both fit the deck equally well. I might go back to the sweep at some point. We'll see.
# Power Banks (opens new window)
These power banks were ideal for the writer deck because, as I mentioned, the monitor and the computer both have their own power ports. These banks have two outputs, so one power bank can serve both pieces. The capacity is big, so I can use the deck for awhile on just one charge. I've never come close to exhausting even one of the power banks in a single session. I do unplug both the monitor and the pi every time so I'm not sneaking power out of the bank when I'm not using it.
# Adjustable Torque Hinges (opens new window)
The rest is odds and ends like a TRRS cable to connect the halves of the keyboards, a USB Micro Male - USB Micro Male cord to connect the keyboard to the pi, and other cables to connect to power, and to connect the pi to the monitor.
# Pretty Pictures
Posted on Tuesday, December 10, 2024